Pottery making is an ancient art that has been practiced for centuries. It’s a craft that has been passed down from generation to generation, and it’s still as relevant today as it was thousands of years ago. If you’re interested in exploring the art of pottery making, then you’re in the right place. In this beginner’s guide, we will take you through the steps of making pottery from scratch. From selecting the right clay to firing and glazing your finished piece, we’ve got you covered.
Getting Started
Before you start making pottery, you’ll need some essential tools and materials. Here’s what you’ll need to get started:
- Clay: Choose a clay that suits your project. Different clays have different properties, so be sure to select the right type for your creation.
- Pottery wheel: A pottery wheel is used to shape the clay.
- Tools: You’ll need tools such as a sponge, wire cutter, rib, and trimming tool to shape and refine your creation.
- Kiln: A kiln is used to fire the pottery and harden it.
- Glaze: Glaze is used to add color and texture to your creation.
Choose the Type of Clay You’ll Use
When it comes to pottery making, clay is the foundation of all pieces. There are several types of clay to choose from, each with its own properties. Stoneware clay is popular for hand-building pieces, while earthenware and porcelain are better suited for throwing on a pottery wheel. Consider the type of pottery you want to make and the types of clay available when selecting the right clay for your projects.
Preparing the Clay
Now that you have the necessary tools and materials, it’s time to prepare the clay. Follow these steps:
- Wedge the clay: Wedging involves kneading the clay to remove air bubbles and make it more pliable.
- Center the clay: Place the clay on the pottery wheel and use your hands to center it.
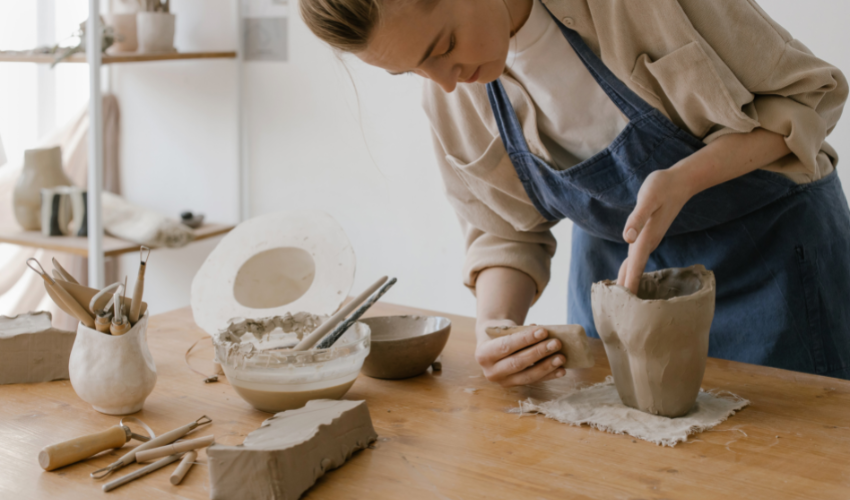
- Shape the clay: Use your hands and pottery tools to shape the clay into your desired form.
Firing and Glazing
Once you’ve shaped your creation, it’s time to fire and glaze it. Follow these steps:
- Dry the pottery: Let the pottery dry completely before firing it.
- Bisque firing: Bisque firing is the first firing process, which removes any remaining moisture and hardens the pottery. Set the kiln temperature to the recommended level and place the pottery inside for firing.
- Glazing: Once the bisque firing is complete, it’s time to apply glaze to your pottery. Glaze adds color and texture to your creation. Apply the glaze using a brush or spray and allow it to dry before placing it in the kiln for the final firing.
- Final firing: The final firing process is crucial as it hardens the glaze and makes the pottery durable. Set the kiln temperature to the recommended level and place the pottery inside for firing.
Tips for Making Beautiful Pottery
- Choose the right clay for your project. Some clays are more suitable for certain projects than others.
- Take your time when shaping the clay. Don’t rush the process as it can lead to mistakes and imperfections.
- Experiment with different pottery techniques and styles to find your own unique style.
- Practice, practice, practice! The more you practice, the better you’ll become at making pottery.
- Don’t be afraid to make mistakes. Mistakes are a natural part of the learning process and can even lead to new creative ideas.
Bullet Points or Numbered List
- When choosing clay, consider the type of pottery you want to make, the firing temperature, and the level of experience you have.
- Make sure your workspace is clean and organized before you start.
- Use a throwing wheel to shape your clay or opt for hand-building techniques if you don’t have one.
- Always let your pot dry completely before firing to avoid cracking.
- The firing process is crucial to your finished piece. Make sure you follow the recommended temperature and firing time for your clay and glaze.
- Experiment with different types of glazes and application techniques to achieve unique results.
FAQs
Can I make pottery at home without a kiln?
Unfortunately, firing pottery requires high temperatures that can only be achieved with a kiln. However, you can still practice your pottery making skills by air-drying your clay pieces or using low-fire clay that can be fired in a home oven.
Is it easy to make pottery?
Making it can be challenging, but it’s also a rewarding experience. With practice and patience, anyone can learn how to make pottery.
Can I reuse clay that has already been thrown?
Yes, you can reclaim and reuse clay that has already been thrown. Simply let the clay dry out completely, crush it into small pieces, and add water to make a new batch of clay.
How long does it take to make pottery?
The time it takes varies depending on the size and complexity of the piece. However, on average, it takes about 2-3 weeks to complete a pottery piece from start to finish.
Can I sell my pottery?
Yes, you can sell your pottery. Many artists sell their work online, at craft fairs, and in galleries.
Conclusion
Pottery making is an art form that has stood the test of time. Whether you’re looking for a new hobby or want to develop your creative skills, pottery making is a great choice. We hope this beginner’s guide has provided you with the information you need to get started on your pottery making journey. Remember to experiment, practice, and don’t be afraid to make mistakes. Making pottery is a process of trial and error, and it takes time to perfect your technique. But with patience and determination, you can create beautiful and unique pieces that you can be proud of. So, go ahead and get your hands dirty, and see where your creativity takes you. Happy pottery making!